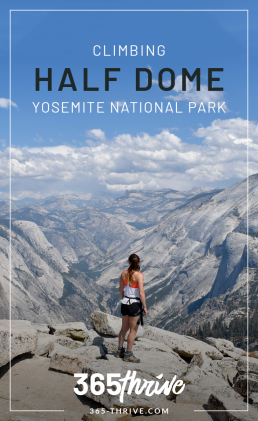
Deep in Yosemite Valley lies Half Dome, the huge rock formation that frequents many a macbook desktop wallpaper and provides a great challenge for many hikers. The 14-16 mile round trip takes most hikers 10-12 hours, gaining in 4,800ft and passing through varying terrain. Recommended only to those with high fitness levels and hiking experience, climbing half dome is a challenge that may well become the highlight of your trip.
We decided to climb it on one drizzly afternoon in the UK whilst planning an incredible adventure through California, a decision I am so glad we made not only for the incredible perspective of Yosemite, but for the physical and mental challenge it proved to be.
In 1868, Joshua Whitney stated that “Half dome was perfectly inaccessible, being probably the only one of all the prominent points about Yosemite which has never been and will never be trodden by human foot.” Only seven years later George Anderson was the first to make the ascent, followed by thousands more to this day due to the construction of metal cables on the last 400ft. The most well known (and feared) part of the trail are those very cables, the steep and very open final ascent to the top of half dome. It is partly for this reason that this hike is listed so highly on the difficulty scale, but that by no means that the rest of the hike is just a walk in the park. Here’s our guide to climbing Half Dome in Yosemite, from how to prepare to what to take and what to expect on the trail.
8800
feet above sea level
12
hour hike
400
feet cable climb
The trail
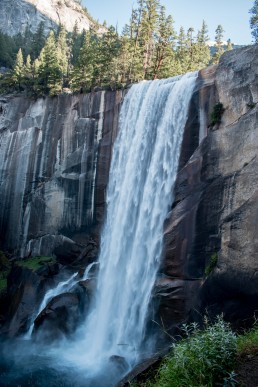
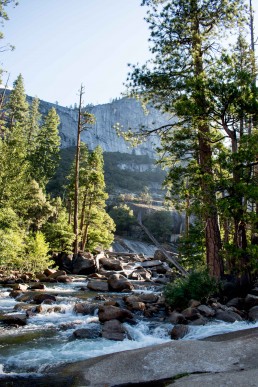
If you’re planning on climbing half dome in one day, you will more than likely be starting on the mist trail. This trail will take you up to the top of Vernal falls and then on to the top of Nevada falls. The trail here is very wet, narrow and fairly steep in parts with uneven steps so it is important that you have a good solid pair of walking boots on. The trail increases in difficulty as you go beyond Vernal falls, snaking back and forth alongside Nevada Falls. The views over the falls are absolutely beautiful and this hike is considered one of Yosemite’s most popular in of itself. With that being said, it can get quite busy but as you’ll be leaving at (or before) sunrise you shouldn’t encounter too many people. We only passed a couple of people whilst on this trail at about 6:30am on a Wednesday in September. Throughout this part of the hike you will come across bathrooms at the top of each fall. These will be the last toilets that you come across on your trip to half dome.
Once you have reached the top of Nevada Falls, you will continue through the forest, climbing in altitude for a good few miles yet before reaching sub dome. This part of the trail is shaded in parts which will no doubt come as a relief from the beating sun. At this point in the hike you will have a clear view of the beast that you are about to climb.
Subdome
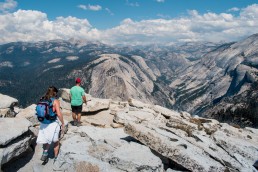
Whilst the cables are the most talked about and feared part of this hike, that by no means that the sub dome is an easy task. Once you’ve showed your permit to the park ranger, you’ll be on your way climbing up and over rocks in the open sunshine. Whilst this may be very challenging, the views from here across Yosemite Valley are absolutely breathtaking and of course, make it all worthwhile.
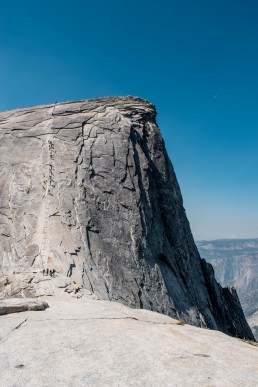
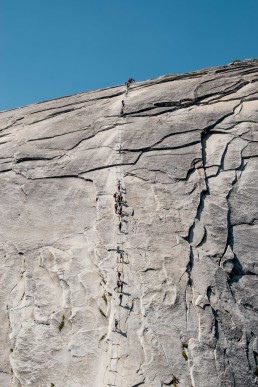
The cables
As you climb up subdome, the cables will come into view and it becomes very clear that the hard work is not over. You’ll find many hikers taking a break here before making the final ascent to the top along with many discarded gloves from those that have come before you. The cables are without a doubt the hardest section of this hike and will test your strength – and courage. This climb should not be underestimated, it is very steep, open to the elements and the granite is smooth. Use the wooden planks to rest on when needed and be considerate of other hikers who are coming back down. I would highly recommend using a harness and clipping on to the cable for added safety. This takes a little time as you need to unclip and clip back in every 10 feet or so. However, it is incredibly steep and there is absolutely nothing to break your fall if you were to slip or be knocked so I would say it is worth the extra effort. You’ll also want to have a strong, shred proof pair of heavy duty gloves unless you’d rather shred your hands along the cable.
It is advised to only climb to the top in good weather conditions, even the slightest bit of rainfall can turn the surface into a dangerous slip and slide with a possibly fatal outcome.
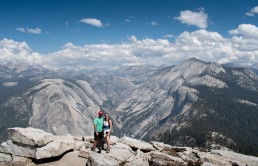
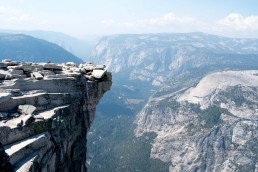
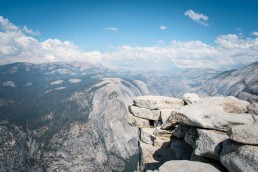
The view
There is nothing quite like the view from the top of half dome. All of the hard work getting up there quickly becomes completely worth it as you gaze across the larger than life panoramic views. It is without a doubt the most breathtaking and overwhelming view I have ever seen, almost seeming too vast to fully take in. Most people spend anywhere from 15 to 60 minutes at the top, pausing to marvel at the views, enjoy a well earned picnic and take photos. If you’re brave enough, you can even stand on an overhang to get that perfect ‘wow’ shot.
Preparing for Half Dome
Permits
In order to make the final ascent you’ll need a permit which can be won through a lottery which takes place at the end of March. If you aren’t lucky enough to win one of these spots then you can enter another lottery two days in advance where an additional 50 permits will be released throughout the summer. It is generally easier to win a permit during the weekday as opposed to the weekend and towards the end of the summer in September/October.
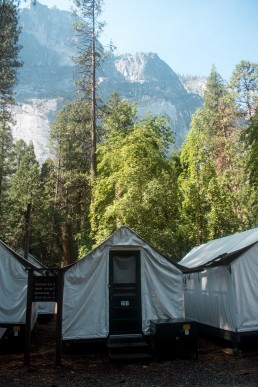
Where to stay
We highly recommend staying in half dome village, just a short 3/4 mile walk (or shuttle bus) from the start of the Mist trail. It’s a great base for this particular hike (and others) and consists of a number of wooden and canvas tent cabins. We stayed in an unheated canvas tent in the middle of September and would recommend possibly upgrading to a heated cabin as it was absolutely freezing during the night and you only have one blanket to keep you warm. There’s a large canteen style building with a variety of food, plus a coffee bar and a pizza place that’s great if you’re on a tighter budget. There’s also a small shop with gifts, basic groceries and hiking gear if you’ve forgotten any of the essentials.
What you'll need
You’ll be hiking from the early hours of the morning and for at least 10 hours so you need to carry the appropriate gear. Below is everything we wore and/or carried with us.
- Well worn in hiking boots & socks
- Comfortable bottoms
- Layers
- Raincoat
- Sunhat/cap
- Sunglasses
- Head torch
- Suncream
- Small first aid kit (inc. blister plasters)
- Climbing harness, carabiners & sling
- Strong, shred proof heavy duty gloves
- 4 litres water*
- Snacks (e.g. nuts, energy/protein bars, fruit)
- Camera
*or a combination of water & a sports drink with electrolytes.
This truly is a fantastic hike that should be at the top of every adventure junkie’s bucket list. With some hiking experience, a good solid level of fitness and plenty of miles to your name, you will conquer what many will only look at from afar. If you’re considering it, then take the leap and do it. The minute you’re standing on top looking across those panoramic views, you will know every second of the climb was worth it.
Have you climbed Half Dome? If so, let me know how it went in the comments!
Happy adventuring,
Lorna
Share
Like it? Pin it!
Related posts
The Ultimate 3 week California road trip: Part 2
After an incredible first week on our 3 week California road trip exploring LA, Santa Barbara,…

A guide to climbing Snowdon, Wales
There really is something quite incredible about the fact that you can drive for less than 5 hours…